Windows XPをルーターとして利用してみよう [Windows]
Windows XPは簡単にルーター化することができます。
セグメントを分けて検証などをしたいときには、とても便利です。
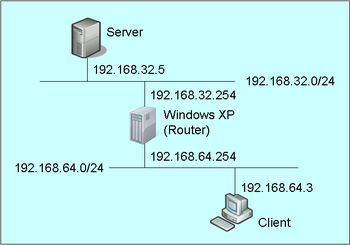
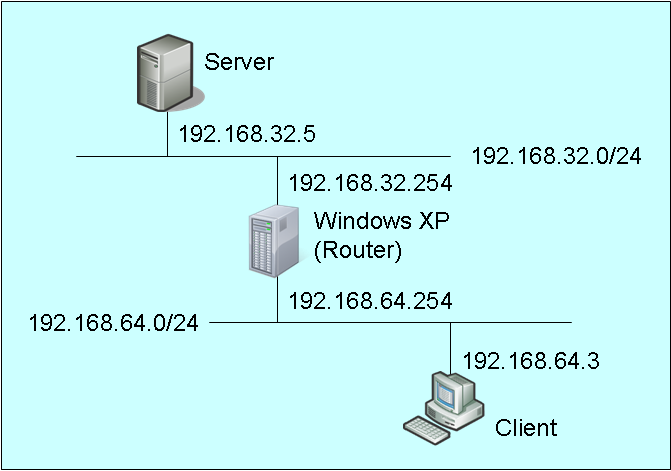
下図のようにServerとClientのセグメントを分けて、ServerとClientの通信ができるようにしたいと思います。
ipconfigは以下のようになっています。
①Server(Windows Server 2008 R2)
イーサネット アダプター ローカル エリア接続 2:
接続固有の DNS サフィックス . . . :
IPv4 アドレス . . . . . . . . . . : 192.168.32.5
サブネット マスク . . . . . . . . : 255.255.255.0
デフォルト ゲートウェイ . . . . . :
②ルーター(Windows XP)
Ethernet adapter ローカル エリア接続 3:
Connection-specific DNS Suffix . :
Description . . . . . . . . . . . : AMD PCNET Family PCI Ethernet Adapter #2
Physical Address. . . . . . . . . : 08-00-27-BC-DA-BF
Dhcp Enabled. . . . . . . . . . . : No
IP Address. . . . . . . . . . . . : 192.168.64.254
Subnet Mask . . . . . . . . . . . : 255.255.255.0
Default Gateway . . . . . . . . . :
Ethernet adapter ローカル エリア接続 2:
Connection-specific DNS Suffix . :
Description . . . . . . . . . . . : AMD PCNET Family PCI Ethernet Adapter #3
Physical Address. . . . . . . . . : 08-00-27-C8-44-DE
Dhcp Enabled. . . . . . . . . . . : No
IP Address. . . . . . . . . . . . : 192.168.32.254
Subnet Mask . . . . . . . . . . . : 255.255.255.0
Default Gateway . . . . . . . . . :
③Cleint(Windows XP)
Ethernet adapter ローカル エリア接続 2:
Connection-specific DNS Suffix . :
Description . . . . . . . . . . . : AMD PCNET Family PCI Ethernet Adapter
Physical Address. . . . . . . . . : 08-00-27-A7-77-9B
Dhcp Enabled. . . . . . . . . . . : No
IP Address. . . . . . . . . . . . : 192.168.64.3
Subnet Mask . . . . . . . . . . . : 255.255.255.0
Default Gateway . . . . . . . . . :
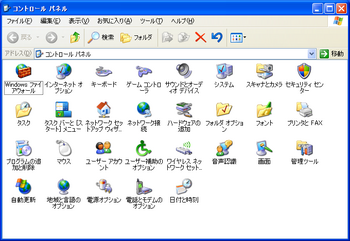
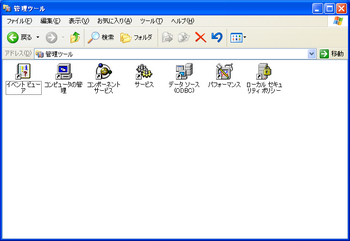
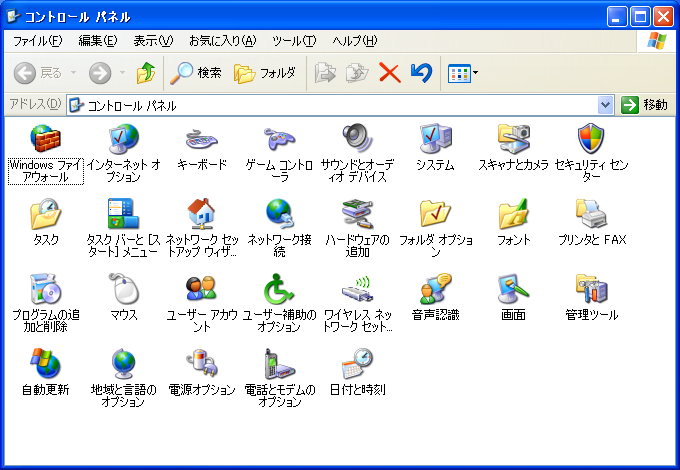
ルーターとなるWindows XPのコントロールパネルを開き、管理ツールをクリックします。
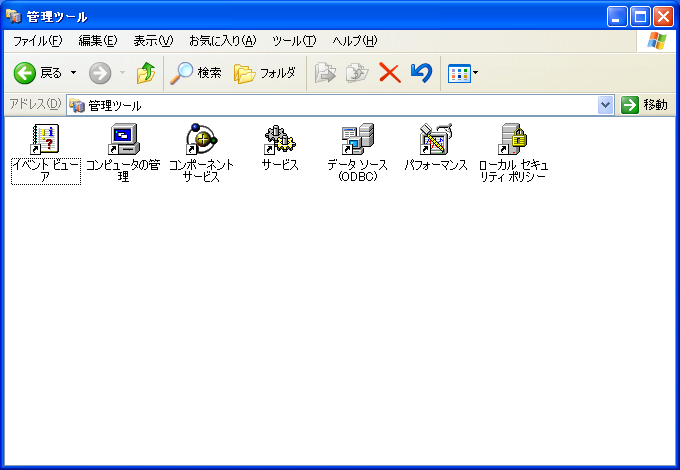
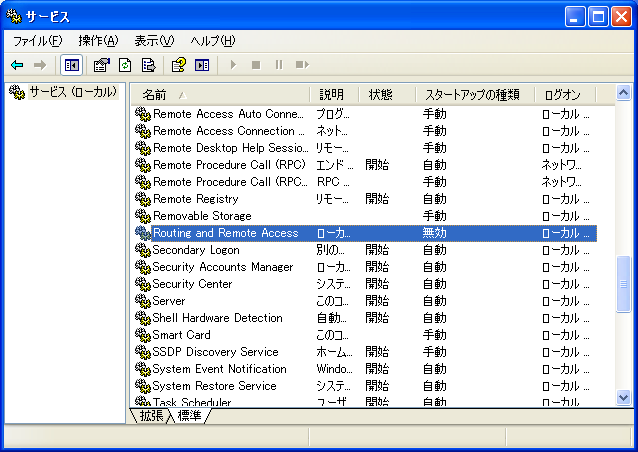
サービスをクリックします。
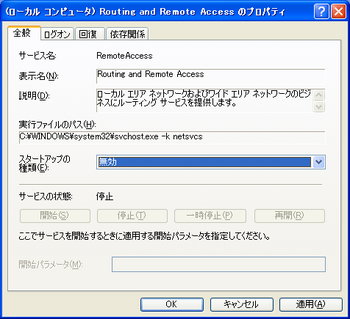
Routing and Remote Accessが無効になっているので、有効化します。
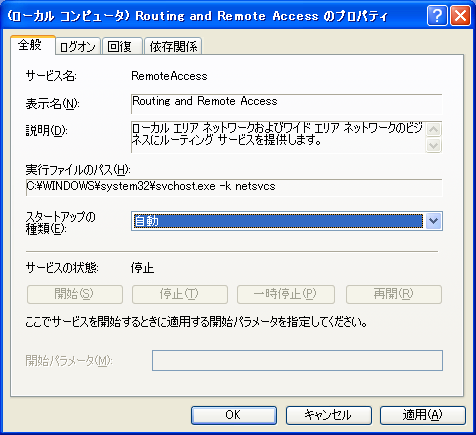
ダブルクリックで開きます。
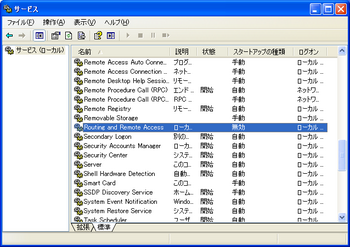
無効を自動に変えます。
適用をクリックします。

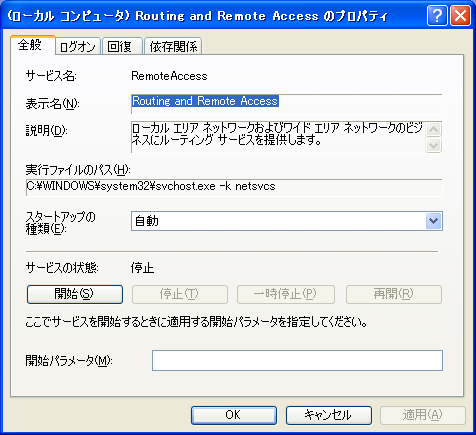
開始をクリックします。
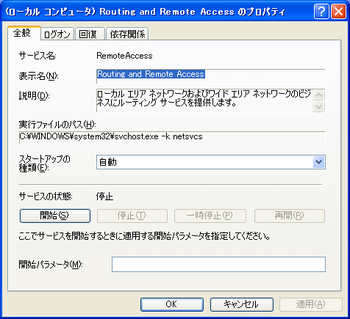
開始状態になったので、OKをクリックします。これでルーターになりました。超簡単です。

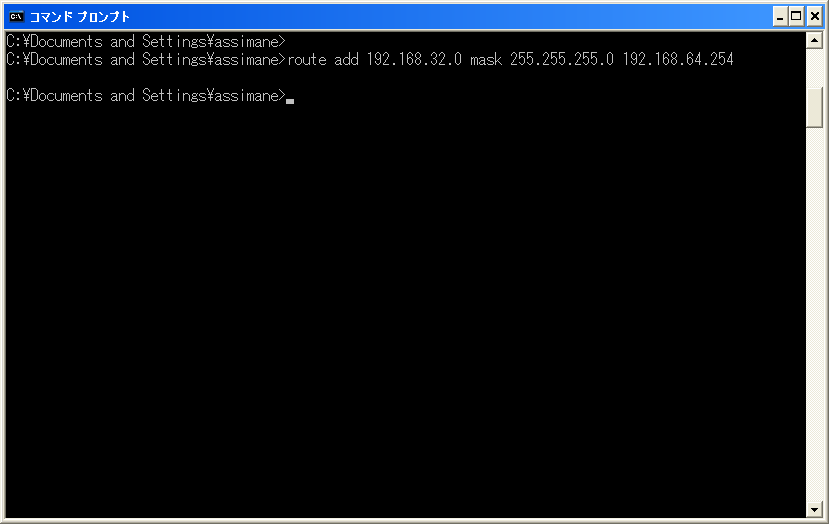
あとは、ServerとClientのWindowsでルーティングを追加します。
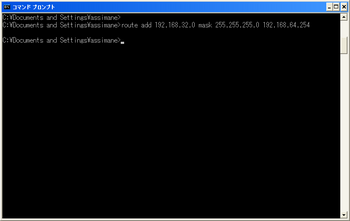
Client側は、XPの192.168.64.254をゲートウェイとして追加します。
route add 192.168.32.0 mask 255.255.255.0 192.168.64.254
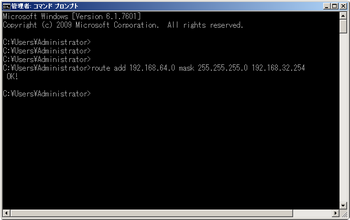
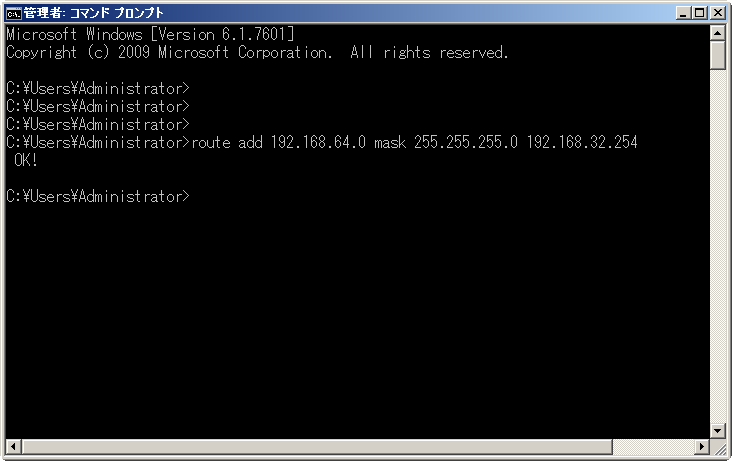
Server側は、XPの192.168.32.254をゲートウェイとして追加します。
route add 192.168.64.0 mask 255.255.255.0 192.168.32.254
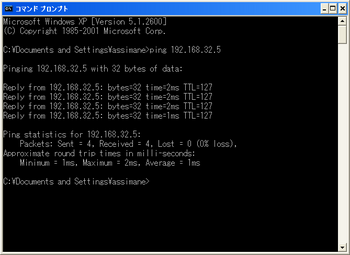
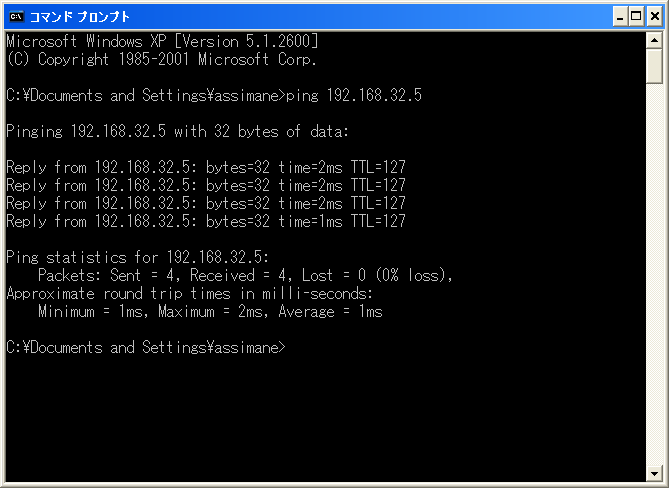
設定したら、ClientからPingで確認します。
次回もお楽しみに!!
セグメントを分けて検証などをしたいときには、とても便利です。
下図のようにServerとClientのセグメントを分けて、ServerとClientの通信ができるようにしたいと思います。
ipconfigは以下のようになっています。
①Server(Windows Server 2008 R2)
イーサネット アダプター ローカル エリア接続 2:
接続固有の DNS サフィックス . . . :
IPv4 アドレス . . . . . . . . . . : 192.168.32.5
サブネット マスク . . . . . . . . : 255.255.255.0
デフォルト ゲートウェイ . . . . . :
②ルーター(Windows XP)
Ethernet adapter ローカル エリア接続 3:
Connection-specific DNS Suffix . :
Description . . . . . . . . . . . : AMD PCNET Family PCI Ethernet Adapter #2
Physical Address. . . . . . . . . : 08-00-27-BC-DA-BF
Dhcp Enabled. . . . . . . . . . . : No
IP Address. . . . . . . . . . . . : 192.168.64.254
Subnet Mask . . . . . . . . . . . : 255.255.255.0
Default Gateway . . . . . . . . . :
Ethernet adapter ローカル エリア接続 2:
Connection-specific DNS Suffix . :
Description . . . . . . . . . . . : AMD PCNET Family PCI Ethernet Adapter #3
Physical Address. . . . . . . . . : 08-00-27-C8-44-DE
Dhcp Enabled. . . . . . . . . . . : No
IP Address. . . . . . . . . . . . : 192.168.32.254
Subnet Mask . . . . . . . . . . . : 255.255.255.0
Default Gateway . . . . . . . . . :
③Cleint(Windows XP)
Ethernet adapter ローカル エリア接続 2:
Connection-specific DNS Suffix . :
Description . . . . . . . . . . . : AMD PCNET Family PCI Ethernet Adapter
Physical Address. . . . . . . . . : 08-00-27-A7-77-9B
Dhcp Enabled. . . . . . . . . . . : No
IP Address. . . . . . . . . . . . : 192.168.64.3
Subnet Mask . . . . . . . . . . . : 255.255.255.0
Default Gateway . . . . . . . . . :
ルーターとなるWindows XPのコントロールパネルを開き、管理ツールをクリックします。
サービスをクリックします。
Routing and Remote Accessが無効になっているので、有効化します。
ダブルクリックで開きます。
無効を自動に変えます。

適用をクリックします。
開始をクリックします。
開始状態になったので、OKをクリックします。これでルーターになりました。超簡単です。

あとは、ServerとClientのWindowsでルーティングを追加します。
Client側は、XPの192.168.64.254をゲートウェイとして追加します。
route add 192.168.32.0 mask 255.255.255.0 192.168.64.254
Server側は、XPの192.168.32.254をゲートウェイとして追加します。
route add 192.168.64.0 mask 255.255.255.0 192.168.32.254
設定したら、ClientからPingで確認します。
次回もお楽しみに!!
Facebook コメント
assimane さん

-
nice! 37743
記事 846
テーマ パソコン・インターネット (16位)
プロフィール
ブログを紹介する
Assimane Blog
よろしければFeedlyに登録してね


コメント 0